
Homemade Country Apple Pie
Maybe your family doesn’t enjoy pumpkin pie(if they do, see a good recipe here), or maybe you’re wanting to make another kind of pie for variety at your Thanksgiving table. You can’t go wrong with good ole’ apple pie.
A few Apple Pie history tidbits:
- Apple pie has been around as early as the mid 14th century. One recipe of the time called for apples, pears, figs, raisins and spices.
- The early American colonists brought young trees from Europe, had to wait for their young apple orchards to reach maturity, and even then they used the apples primarily for cider. Pies were usually made with meat, not fruit. But in the mid 18th century Americans finally were making their apples into pies.
- In the 18th century, American pioneers on the trails made pies from crackers and spices in the absence of apples, and were called “mock apple pies”. These were also eaten during the depression of the 1930s.
- Today, apples are plentiful, and apple pie is a favorite not just for Thanksgiving, but year-round.
Time to make a pie. This recipe makes a deep dish 10 inch pie. Your pie plate should measure 10 X 1 1/2 inches.
Pastry Ingredients:
- 1 cup shortening
- 2 2/3 cups all-purpose flour
- 1 teaspoon salt
- 8-10 tablespoons of water
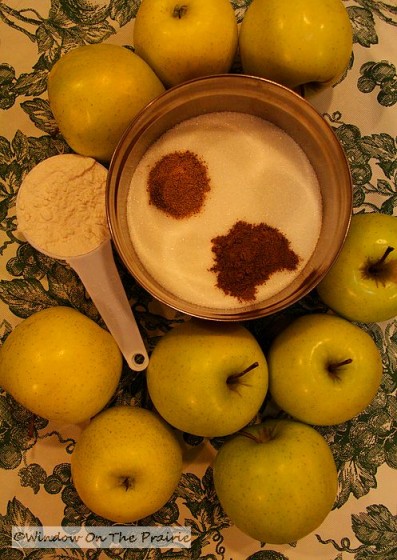
Filling Ingredients:
- 1 cup sugar
- 1/4 cup all-purpose flour
- 3/4 teaspoon ground cinnamon
- 1/2 teaspoon ground nutmeg
- Dash of salt
- 8 cups sliced cooking apples
Preheat oven to 425 degrees F.
Directions for Pastry:
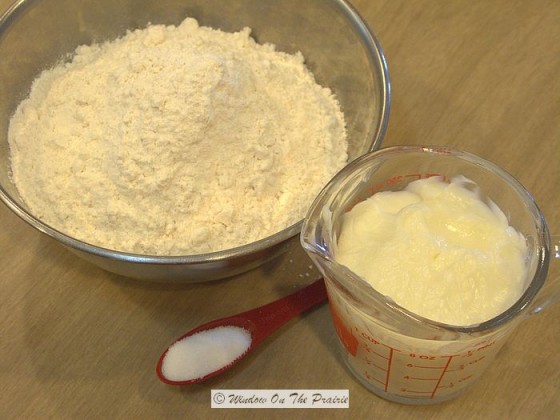
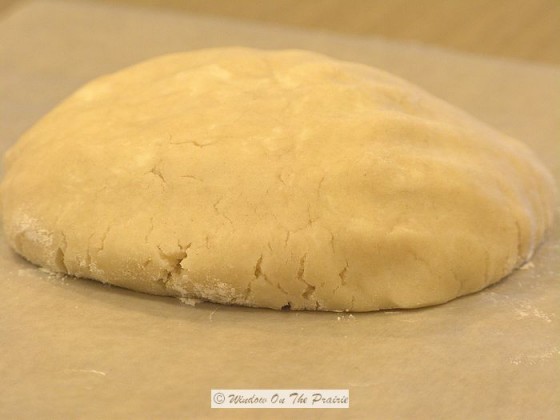
Put the shortening and salt in a mixing bowl with the flour.
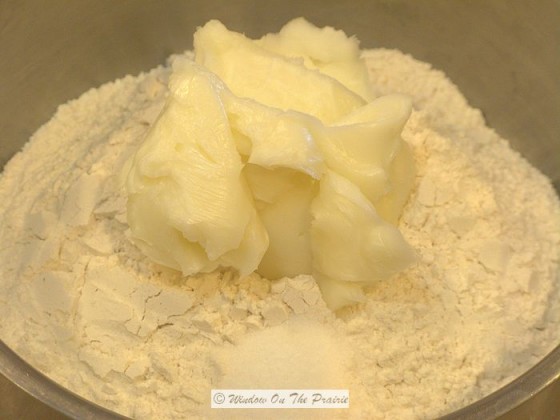
Mix with a fork or pastry blender until it looks like this:
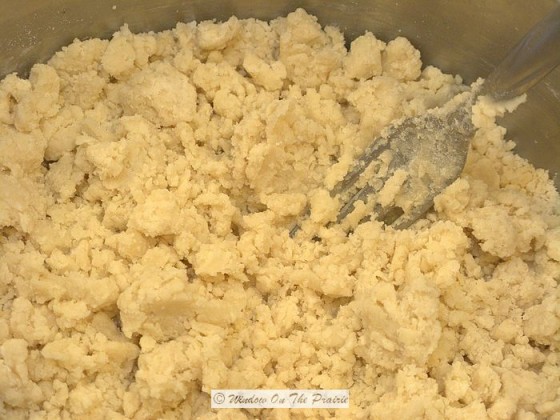
Add water, a couple tablespoons at a time,
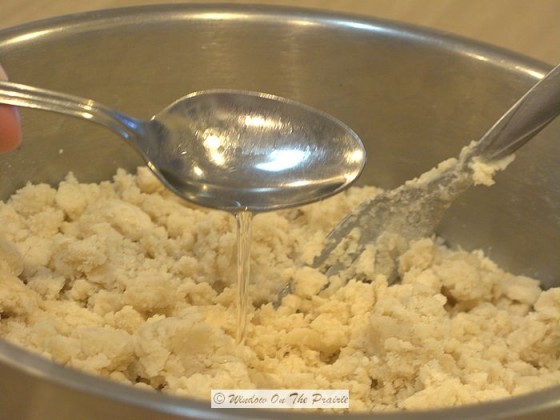
and stir with a fork until it looks like this:
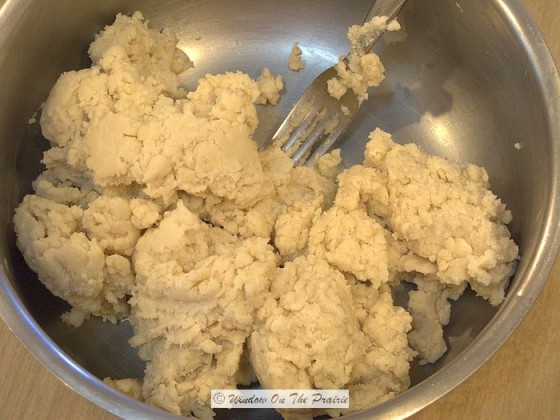
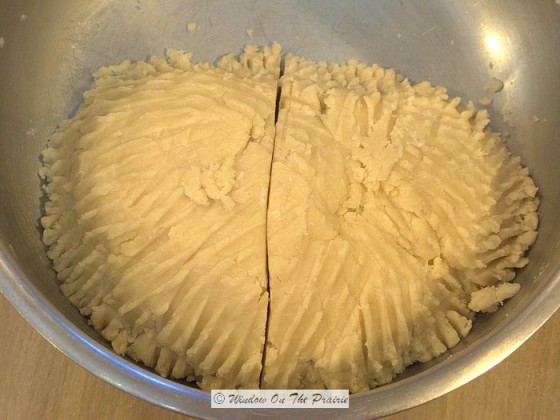
Form into a uniform mound with the fork, and cut roughly in half with one half bigger than the other.
Take the larger half, and roll into a ball, coat with flour, and place on a piece of wax paper.
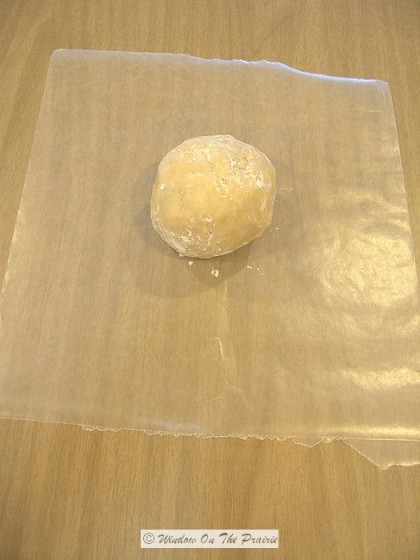
With your hand, press the ball down into a flying saucer shape.
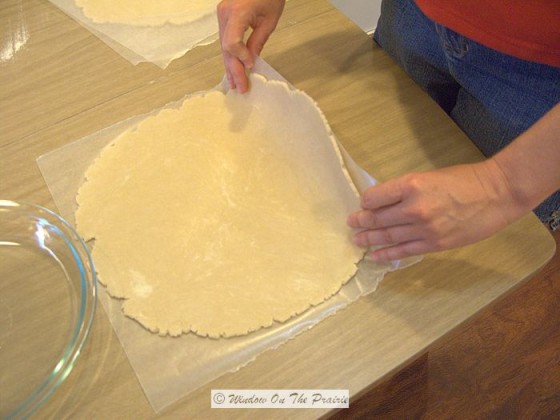
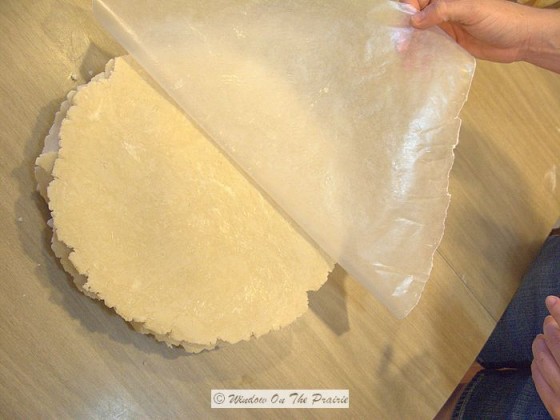
Place another sheet of wax paper on top, and then roll out the pie crust with a rolling pin.
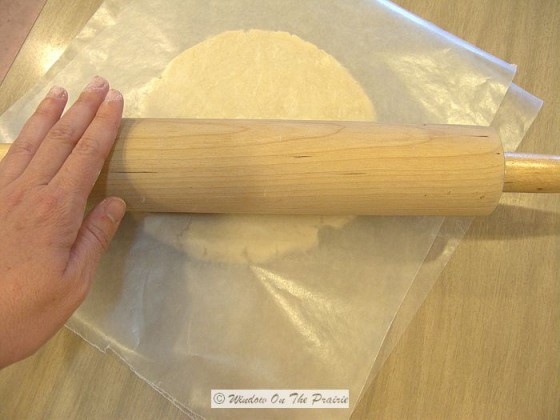
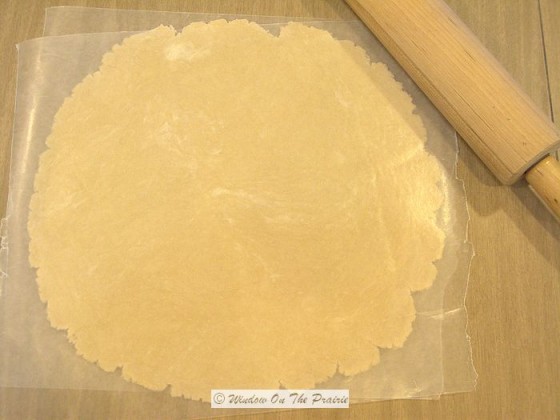
Using the flat of your hands on the pin, and starting at the halfway point on the crust, roll the pin towards you to the edge of the crust(not over the edge), and then turn the crust 1/4 turn. Roll again and turn. Keep rolling until it looks like this and is about 12 inches in diameter. This will be the bottom crust.
Using the steps above, roll out the remainder of the crust, only roll it out a little smaller than the bottom crust. This will be the top crust.
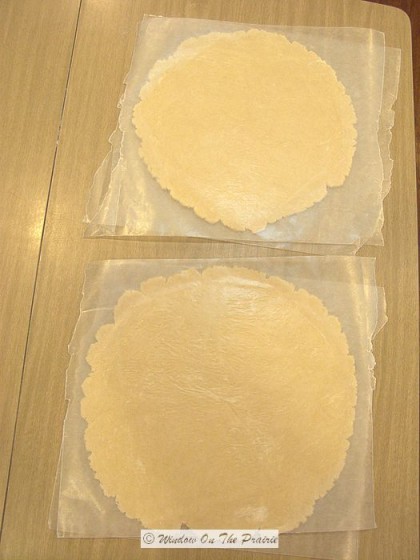
Now put both crusts in the fridge to cool off.
Directions For Filling:
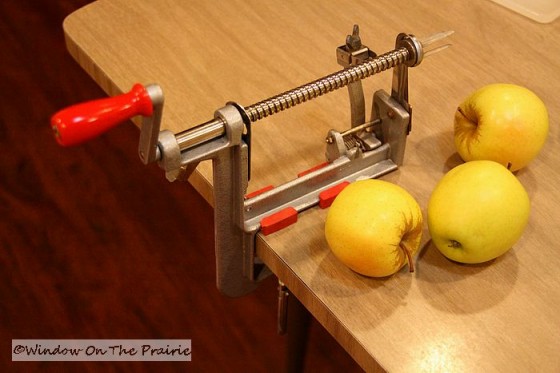
Peel, core and slice your apples until you have 8 cups. I used to do this with a peeler and knife, until about 10 years ago when I bought this baby:
Put the apple on the prongs:
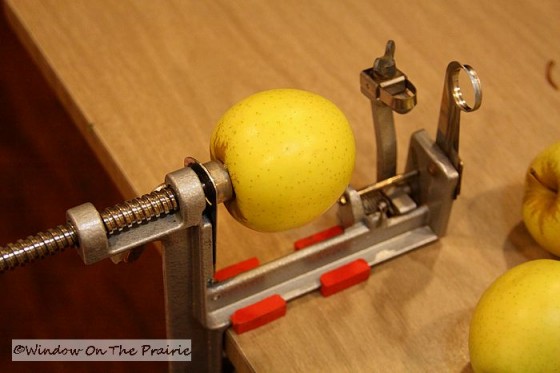
Turn the crank and the apple is peeled,
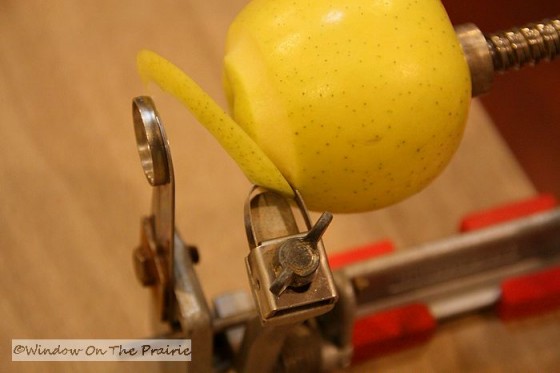
spiral sliced,
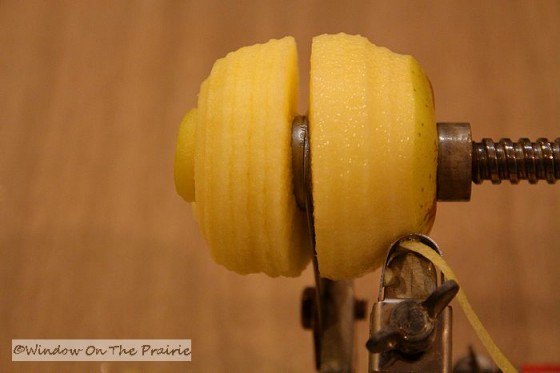
and cored,
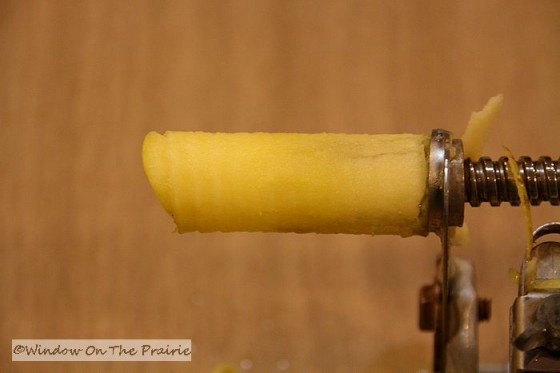
and look how pretty a job it does.
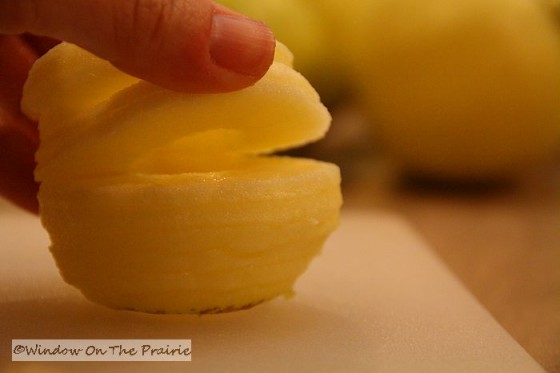
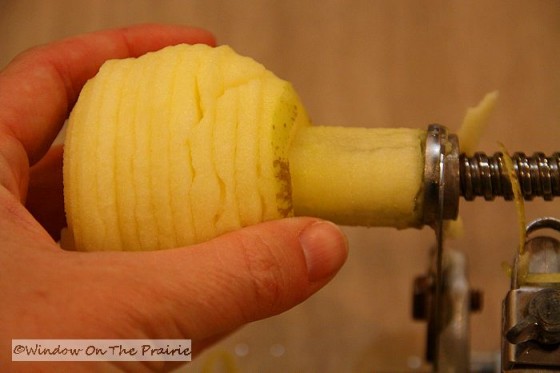
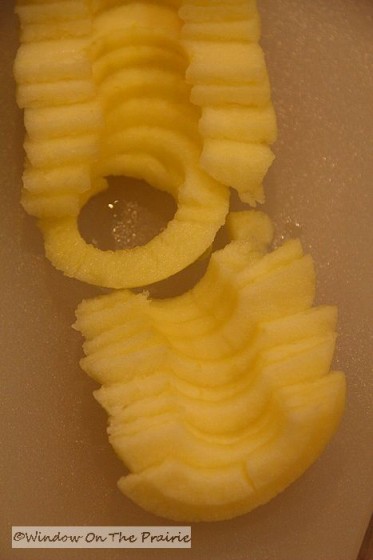
All you have to do is slice the apple in half,
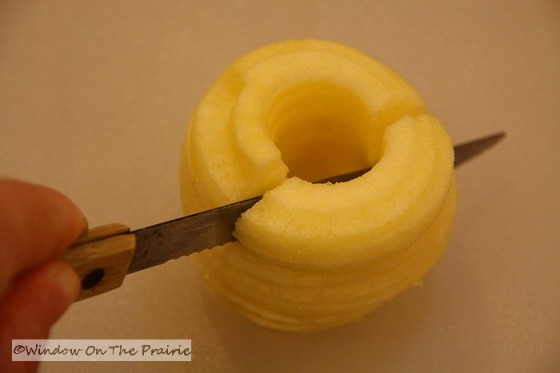
and you’ll have all these perfect slices.
I got my apple peeler/slicer/corer from Pampered Chef. Click here. (This is not a paid endorsement, yadda yadda…)
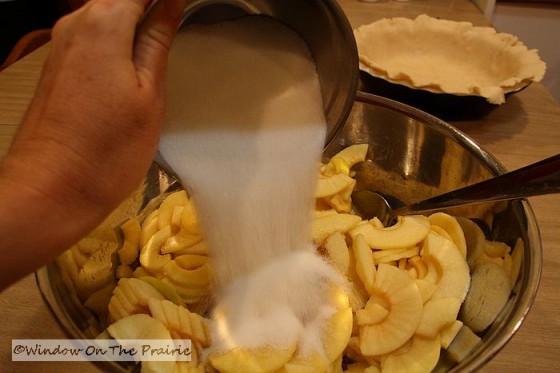
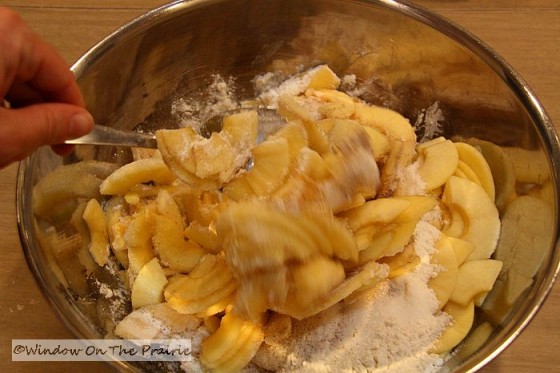
Put the 8 cups of sliced apples in a large mixing bowl and add the sugar, cinnamon, nutmeg, and dash of salt. (I first mixed them all together in a small bowl)
Add the flour,
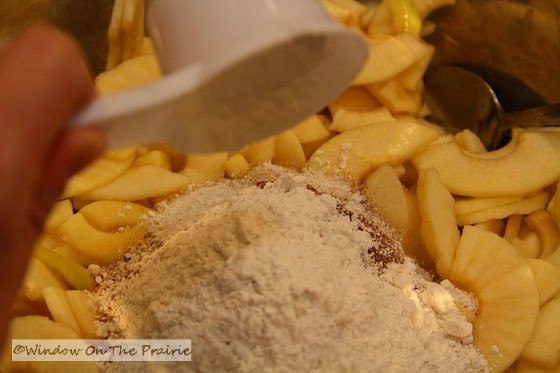
and then toss the apples with a large mixing spoon to coat well with the dry ingredients.
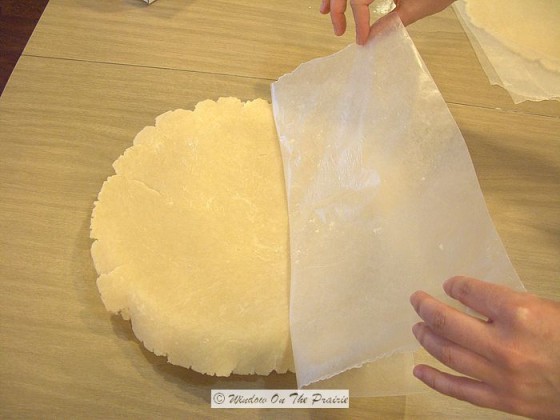
Remove the pastry from the fridge. Peel the top layer of wax paper off the bottom crust, and flip the crust over onto the pie dish.
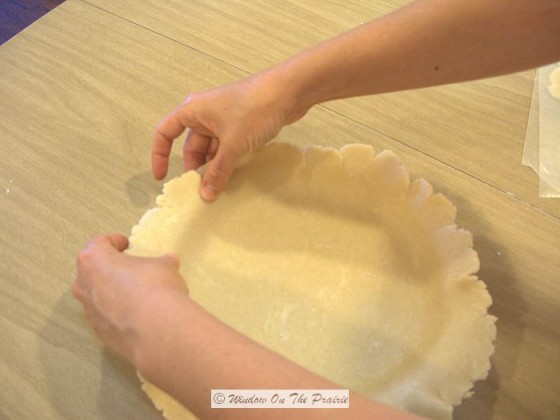
Gently peel off the remaining layer of wax paper.
Gently ease the crust down into the dish by pulling the sides away from the dish and letting gravity do the rest. If you get a tear, just press the 2 edges of the tear together to mend.
Pour the filling into the crust.
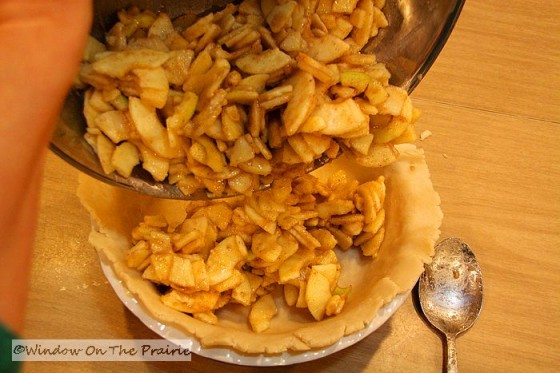
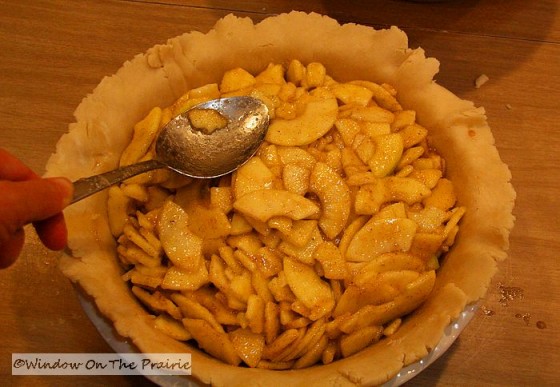
Gently form apples into a mound.
Peel top layer of wax paper from top crust, and then turn the crust over onto the pie. Gently remove remaining wax paper.
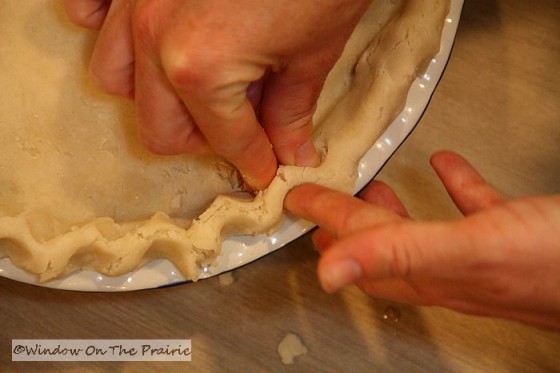
Roll the edges of the 2 crusts under and press down gently onto the edge of the pie plate.
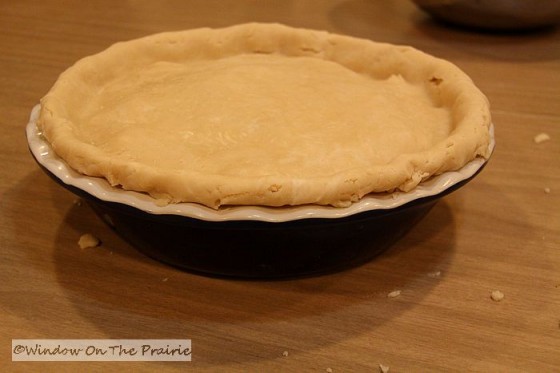
Crimp the edge to form a pretty seal.
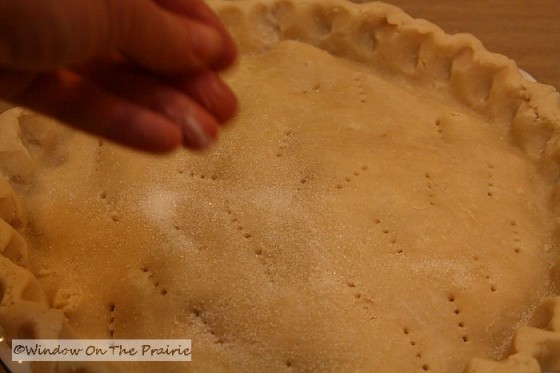
Pierce the top crust with a wet fork to vent.
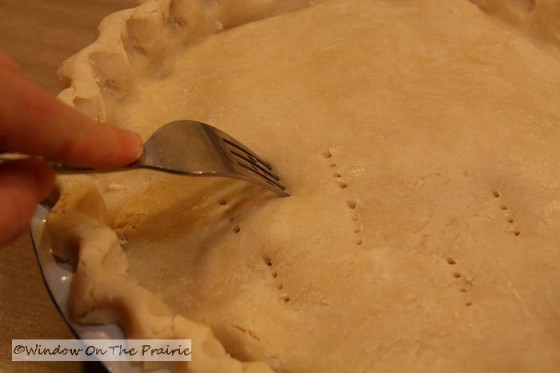
Sprinkle with some sugar.
Place pie in your preheated 425 degree oven.
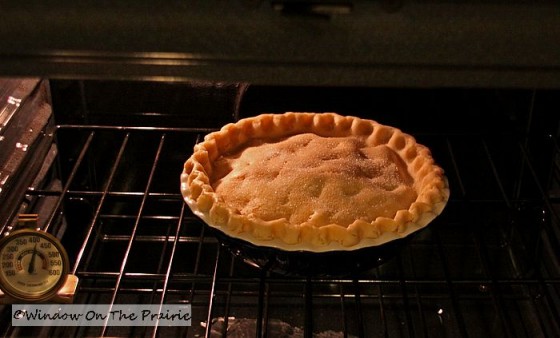
See the oven thermometer there on the left? I’ve used a total of 5 ovens in my life, and not a one of them has been accurate. Get yourself one of these babies, and adjust the temperature accordingly.
Bake 40 – 45 minutes. About halfway through the baking time, put a ring of foil over the crust edge. This will prevent it from over-browning.

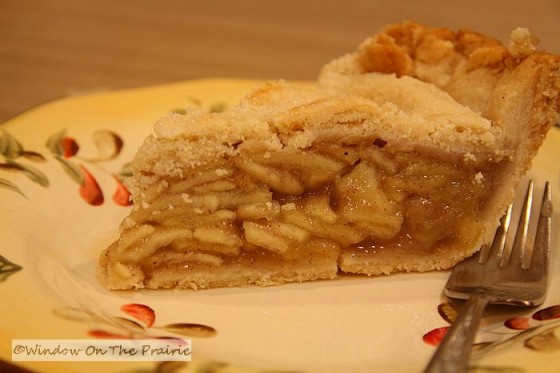
When done, remove pie from oven, and let cool. This recipe makes a nice deep pie.
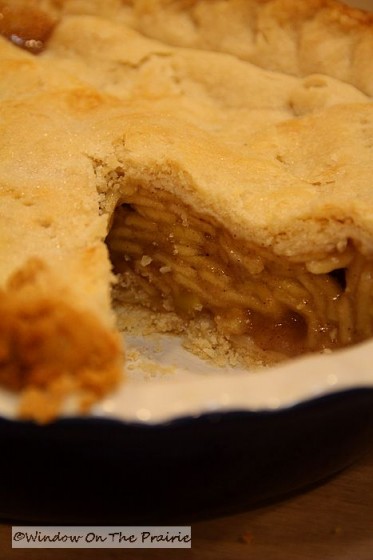
Serve it up, and grab a fork.
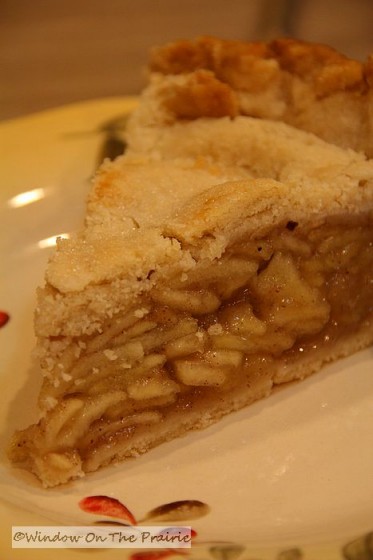
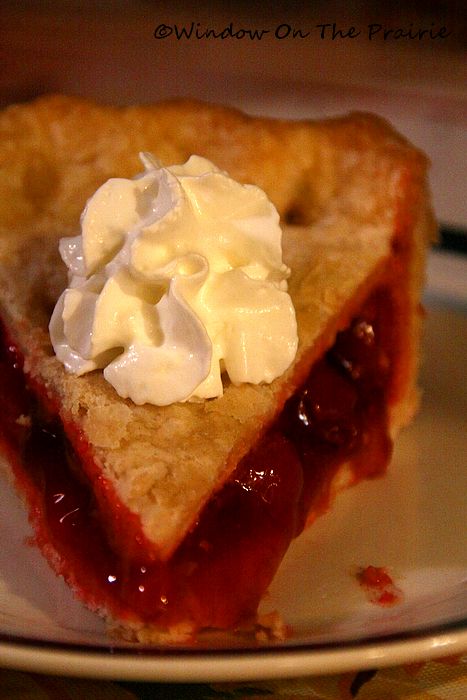
Top with whipped cream if you like, and enjoy!
![]()
——-> UP NEXT: Two things you don’t want to hear from your husband when he is in the field harvesting.
- “Hurry and bring the pick-up truck out to the cornfield, I’ve got something that needs to go into the back of it.”
- “I almost set the combine and bean field on fire today.”
~~~~~~~~~~~~~~~~~~~~~~~~~~~~~~~~~~~~~~


That certainly does look good. Some day, I’m going to have to get me one of those fancy apple peeler/corers.
Hi Teresa,
You won’t regret it. It’s a little pricey as far as kitchen gadgets go, but I have to say I’ve never regretted buying it.
Oh man, your apple pie looks so darn good! I want to eat it for breakfast!! I am jealous of your apple/peeler/corer/slicer. No fair! I have wanted one of those for years. I HAVE to get one of those. If I did get one, I probably wouldn’t get to use it because my kids would be BEGGING to peel the apples with it! I love how you can roll out your pie crust into the perfect circle!!!! Mine comes close, but I inevitably always do some reshapeing and trimming. My Dad doesn’t like pumpkin pie…I will probably bake him an apple pie for Thanksgiving and give it to him to take home after dinner. He will be so happy. I will use your recipe!
Hi Bonnie,
I did have it for breakfast this morning. 🙂 Tee hee. Nutritious and delicious.
Oh my! Those poor apples. It looks like you’re torturing them 🙂
The apple pie looks really sweet though 🙂
HI Lauren,
Funny you should mention that because when I pulled the peeler out of the cabinet, I showed it to Kitty and told her that it was used on bad Kittys. She was not impressed. 😉
What great pictures and a beautiful pie! I have been in the test kitchen making a “healthy choice” pumpkin pie. I lost 40 pounds this year and will at least make an effort to get through the holidays with minimal gain.
Hi Sally,
Congrats on the weight loss. Keep it up. You should be very proud of yourself. Harland(hubby)lost 40 pounds last year and has kept it off, no thanks to me making pies and goodies all the time.
Looks so yummy! But I missed your history lesson. You are usually good for a few fun facts to start out your posts… Just thought I would let you know that I like them 🙂
Hi Kara,
I forgot the history tidbits. I just added them to the post. Thanks for reminding me. Been so busy lately I meet my own backside coming around a corner. 😉
Be careful when you remove each core. Make sure the peeler is in the forward positon.
Otherwise you may have a sliced hand, too. Been there! We always have apple and pumpkin
pies.
Hi Elaine,
Thank you for the advice, will keep an eye on that as it is sharp.
This is the first time I have ever posted a comment on any website. This is the best apple pie I have ever baked. Thank you so much Suzanne for posting it : )
Well Thank You very much Kerry! I’m so glad you enjoyed it! 🙂
I really enjoy your blog, I have a apple peeler just like that, I got mine at party. Thanks, Kay
Your pie recipe and au gratin potatoes and fried chicken makes my stomach growl. I love this blog so keep up the good work.
Oh Thank you Darlene. And THANK YOU for visiting!
Hi everyone! I made all my pies today,and yes one of them was Suzanne’s apple pie! I’ll get to eat it on thanksgiving with all my guest.crossing my fingers it turned out well-it seems to look good,and flaky.Hmm,we’ll see
Hi Dee, hope your pie turned out well. Happy Thanksgiving!
Have I got a pie story for you! There’s a pie bakery near where I live and I decided to go in and check it out. I asked the owner if he had any apple pies (b/c I didn’t see any out). He goes and gets one and rings it up. It was $26. OMG. I felt like a dork for asking so I bought it 🙁 Then on Wed night b4 Thanksgiving I decided to bake a apple pie to compare. I haven’t baked one in 4-5 years, so it came out undercooked (but the crust and flavor was awesome). Next time I’ll come here! The bakery pie was good, but not outstanding. I could have gotten a store bought pie for $4.00 and it would have matched the taste. Oh well live and learn!
Oh My WORD! $26 for a pie??? I’m in the wrong business…. That’s horrible. Robbery!
Thanks for the recipe Suzanne. This is the same recipe my Momma would use, all the previous years of Thanksgiving and Christmas. I found you on the Pioneer Woman Cooks. Happy Thanksgiving!
OMG!!! Your apple pie looks so good! That’s my favorite kind of pie.
I’ll try to do it. I have a doubt: do you put some butter to make the pastry? Thanks for sharing!